As of mid September, Tensorflow is easy to install if all you want to use is a CPU. As someone with no experience using Cuda, installing GPU drivers on Ubuntu or using Bazel, I ran into a panoply of issues installing Tensorflow with 10-series GPU support:
- 10-series GPUs require CUDA 8RC for the libraries to work properly
- instructions on the tensorflow website only work with CUDA < 8
- CUDA 8.0 won’t work with the Tensorflow packages on on the tensorflow website so you’ll have to build from source
- the current source code on github has bugs that need manual repairs.
After a weekend, I finally got Tensorflow to work with an EVGA GTX 1060 GPU. In this post, I’ll go through my steps starting with preparing your machine before installing the GPU and ending with installing Tensorflow into a conda environment. Although this post assumes Ubuntu 14.04, many of the troubleshooting techniques originated from people using 16.04.
0. Prep your machine
Prepping your machine will take a surprising large amount of time and will come back to bite ya if it’s not done correctly. If you still are having issues with getting your GPU to work with Tensorflow, it’s probably because something went wrong here. I’d suggest doing this part carefully.
Removing previous drivers and modules
To remove previous nvidia drivers use
$ sudo apt-get purge nvidia-*
Check if you have any modules in your kernel by running
$ dkms status
If you get any output, you’ll have to use remove the modules.
nvidia modules
If you have nvidia modules installed, the output would be in the form
<module name>,<module version>,<kernel version>
Remove the nvidia module with
$ sudo dkms remove <module name>/<module version> -k <kernel version>
bbswitch modules
Uninstall bbswitch with
$ sudo apt-get remove bbswitch-dkms
Uninstalling CUDA Toolkit
If you’ve installed a previous version of the CUDA toolkit or want to start clean, remove the old directory with
$ rm -rf /usr/local/cuda-7.5
but substitute the appropriate path and version of CUDA (the above is the default). Then remove and purge using apt
$ sudo apt-get remove nvidia-cuda-toolkit
$ sudo apt-get remove --auto-remove nvidia-cuda-toolkit
$ sudo apt-get purge nvidia-cuda-toolkit
$ sudo apt-get purge --auto-remove nvidia-cuda-toolkit
nomodeset
You’ll probably have to edit the file in /etc/default/grub so that
GRUB_CMDLINE_LINUX_DEFAULT="quiet splash nomodeset"
This will let Ubuntu use nouveau drivers (these are reverse engineered drivers not created by nvidia) so that you can use your GPU before installing the nvidia driver (step 4).
1. Physically install the GPU
This will hopefully be the easiest part of the install. If you’ve never installed a graphics card, there are plenty of youtube videos to help. Make sure that you install the card into a PCIe 3.0 to get the best performance.
2. Install CUDA 8.0RC
Download the CUDA Toolkit 8.0RC from nvidia (you’ll need to signup by giving them your email). For the installer type, I used the deb (local) method, but people have had success using the runfile.

Just add the package and install.
$ cd ~/Downloads
$ sudo dpkg -i cuda-repo-ubuntu1404-8-0-rc_8.0.27-1_amd64.deb
$ sudo apt-get update
$ sudo apt-get install cuda
3. cuDNN v5.1
You’ll need to download the cuDNN v5.1, which is a library for machine learning, from nvidia (you’ll need to respond to a survey and accept terms before downloading).

Next, unpack cuDNN, copy the files into the cuda folders, and set permisions.
$ cd ~/Downloads
$ tar xvzf cudnn-8.0-linux-x64-v5.1-ga.tz
$ sudo cp cuda/include/cudnn.h /usr/local/cuda/include
$ sudo cp cuda/lib64/libcudnn* /usr/local/cuda/lib64
$ sudo chmod a+r /usr/local/cuda/include/cudnn.h /usr/local/cuda/lib64/libcudnn*
4. Install the 367.44 driver
First download the driver from nvidia.

Make sure to select the correct series, product, and OS. Then you should be directed to the 367.44 driver, which you should download.

The easiest way to install the driver is to use the GUI so you won’t have to mess with stopping Xorg. Ubuntu should be able to find the downloaded driver if it’s in your Downloads folder. Open up Additional Drivers by using the GUI,
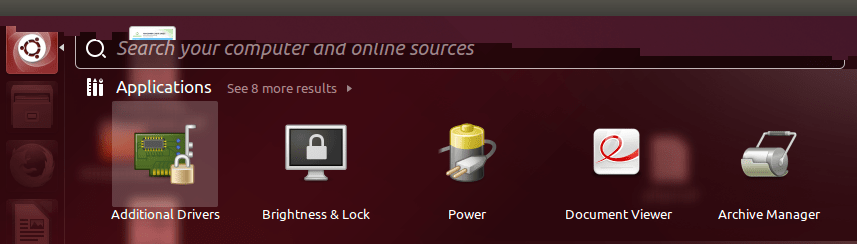
or open a terminal and enter
$ software-properties-gtk --open-tab=4
You should see the 367.44 driver; select it and apply.

5. Reboot
Now that you think the driver is installed, it’s good to reboot the machine
$ sudo reboot
and make sure everything works.
If you’re drivers are properly installed, everything will boot like normal. You’ll know your drivers aren’t working if, when Ubuntu tries to start, your monitor turns purple or black and stays that color. You can try to go back and repeat single steps, but you might have to restart this process by going back to step 0 and working your way back here.
6. Install Bazel
To install Bazel, you can follow the instructions on their site, but they are repeated here.
$ sudo add-apt-repository ppa:webupd8team/java
$ sudo apt-get update
$ sudo apt-get install oracle-java8-installer
$ echo "deb [arch=amd64] http://storage.googleapis.com/bazel-apt stable jdk1.8" | sudo tee /etc/apt/sources.list.d/bazel.list
$ curl https://storage.googleapis.com/bazel-apt/doc/apt-key.pub.gpg | sudo apt-key add -
$ sudo apt-get update
$ sudo apt-get install bazel
$ sudo apt-get upgrade bazel
7. Clone Tensorflow
You’ll be building Tensorflow from source, so the first step is to clone from github.
$ git clone https://github.com/tensorflow/tensorflow.git
It doesn’t matter where you clone it into (I chose the home directory), because you’ll use Bazel to build a pip wheel that you then can use with pip to install where ever you’d like.
8. Fix errors in current Tensorflow
It turns out that there are some errors (As of September 11th) in the source code (see this discussion), so you’ll need to manually edit some of the BUILD files. For each edit, just search for the key term in the specified location and comment out per the instructions.
Edit 1
key term: android_tensorflow_kernels_no_rtti_lite_runtime
location: ~/tensorflow/tensorflow/core/kernels/BUILD
comment instructions: There should only be one occurrence of the term; comment out the target where it occurs.

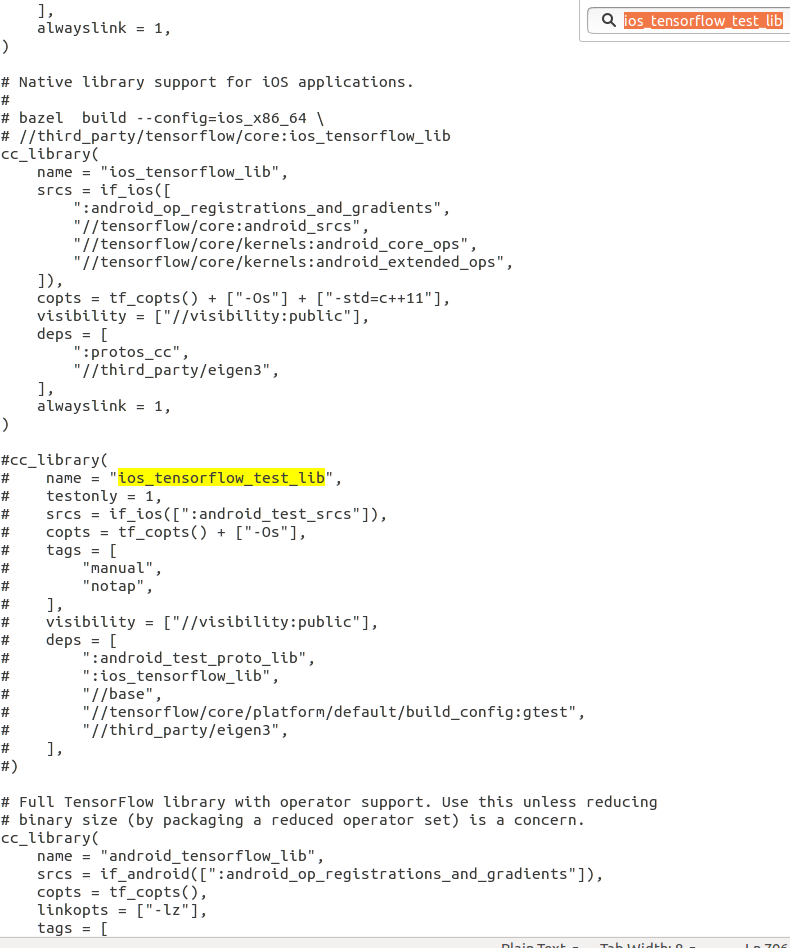
Edit 2
key term: ios_tensorflow_test_lib
location: ~/tensorflow/tensorflow/core/BUILD
comment instructions: There should only be one occurrence of the term; comment out the target where it occurs.
Edit 3
key terms: if_mobile, if_android
location: ~/tensorflow/tensorflow/contrib/session_bundle/BUILD
comment instructions: Search for if_mobile or if_android and you should find 5 occurrences. For the first occurrence, inside load, you don’t need to comment anything out.

For the other 4 occurrences, you’ll need to comment out the if_mobile, if_android, and if_ios conditions as shown below.

9. Install Anaconda
If you haven’t already, install anaconda by following these directions. It helps to do this before configuring the Bazel build because anaconda has all the packages that Tensorflow needs to compile.
10. Configure the build
To configure the Bazel build, go to the root of your tensorflow directory (the code below assumes it is in the home directory) and run the configure file.
$ cd ~/tensorflow
$ ./configure
Then make sure to accept the GPU installation and you can get away with accepting the defaults for the rest.
10. Compile Tensorflow with Bazel
To build Tensorflow from source, use these Tensorflow instructions which are repeated here.
$ bazel build -c opt --config=cuda //tensorflow/tools/pip_package:build_pip_package
$ bazel-bin/tensorflow/tools/pip_package/build_pip_package /tmp/tensorflow_pkg
11. Set up conda environment to install tensorflow
The name of the conda environment will be “tensorflow.” Install all anaconda packages (so you can use stuff like jupyter notebook right away).
$ conda create --name tensorflow anaconda
UPDATE: If attempting to install in a conda environment, make sure not to specify the python version (e.g. python=2.7). For some reason, when you install the Tensorflow pip package, all your numpy packages will break (even outside the environment!), and you’ll have to reinstall anaconda.
12. Install Tensorflow
First, activate the environment that Tensorflow will be installed in, then install Tensorflow.
$ source activate tensorflow
$ sudo pip install /tmp/tensorflow_pkg/tensorflow-0.10.0rc0-py2-none-any.whl
You’re all done! Hopefully everything worked and you can get back to training models. Thanks for reading!

Hello blogger, i must say you have hi quality articles here.
Your website should go viral. You need initial traffic
boost only. How to get it? Search for: Mertiso’s tips go viral
LikeLike